WKL200 – Reflection (01)

In January, the company Siemens approached graphic design students for logo work. Presumably because the belief that students face less creative constraints due to their freelance status. (But boundaries are set by briefs, regardless!) The brief presented was a challenge for me, with highs and lows.

As with all clients that approach you, it’s important to understand where they are coming from. I needed to do a lot of reading up on the company, as I knew next to nothing about the history of Siemens or the specific line of work that the logos were requested for; their off shore wind farms.

diagram_hohe-see-and-albatros-wind-farms-at-a-glance
Diagram showing Hohe See and Albatros’ planned number of turbines

I did end up researching what the daily routine of an engineer is, what environment they are working in, the clothes they wear, and the equipment they use etc. But the brief strained the importance of the place the work was at. The brief also made it clear that the The logos were not for the farms themselves, but rather the people who work on the farms. The workers were keen to wear emblems that reflected themselves as a ‘team’.

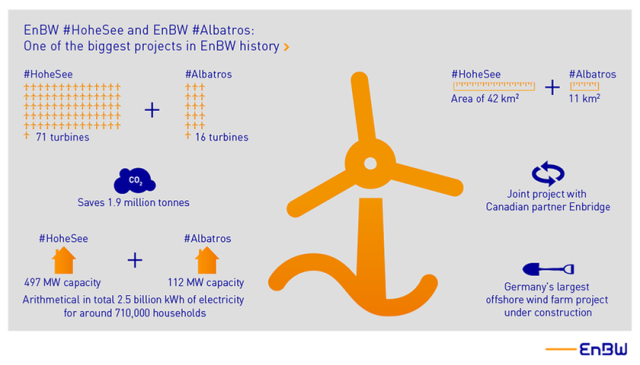
The specific farms that required logos were Hohe See and Albatros and Horn Sea TwoThe most important of the key desirables was to create a symbol that represented the men at work and their ‘team spirit’. The workers were very interested in emblems such as the ones created by Bands FC (Football league and Album cover crossovers). This element of the brief was not received too well by a number of students (for being restrictive from the get-go) and many approached the brief in other directions initially.

mb_mitmedialab_12
MIT Media Lab directory that used symbols for departments

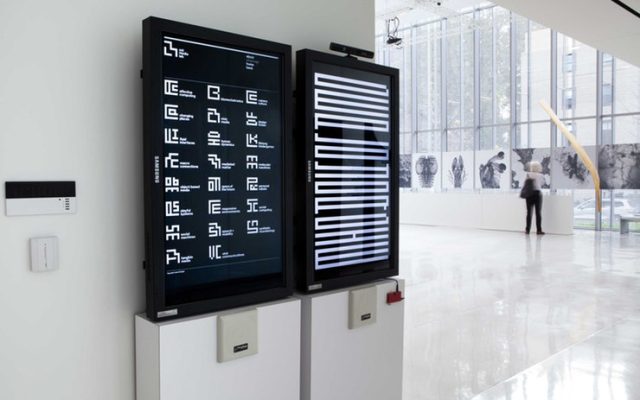
I even approached the brief by attempting to create logos that shared visual elements (shapes or pattern) to keep some consistent identity across the two teams. The decision to explore this was made concrete after looking at logo work by Pentagram for MIT Media Lab. This approach was not well understood by the client, and I understood that they disliked it.

hhhornseaa
Logos made using arcs that can be read as waves or wind

When I presented pencil scamps to the client, it was very much a case of straying too far from the client’s wishes, and my scamps were not meeting the goals. I had in mind a more conservative and corporate logos – ones that work great in monochrome, and on any scale –  ones that could be easily replicated on clothing, letter heads, stationary etc.

HOHE SEEE
Hohe See and Albatros logos that use the same arcing shapes

Versatility of the logo was something that actually wan’t a necessity. It wasn’t stated in the brief that the logo would be for anything more than ‘personal use’. But it also wasn’t stated that the workers would be the only ones to sport the logo either. I had drafted and crafted a number of logos thinking they’d have to adhere to the general rules of logo design.

very practice logo
Vectors I made to explore Hornsea Two colour options

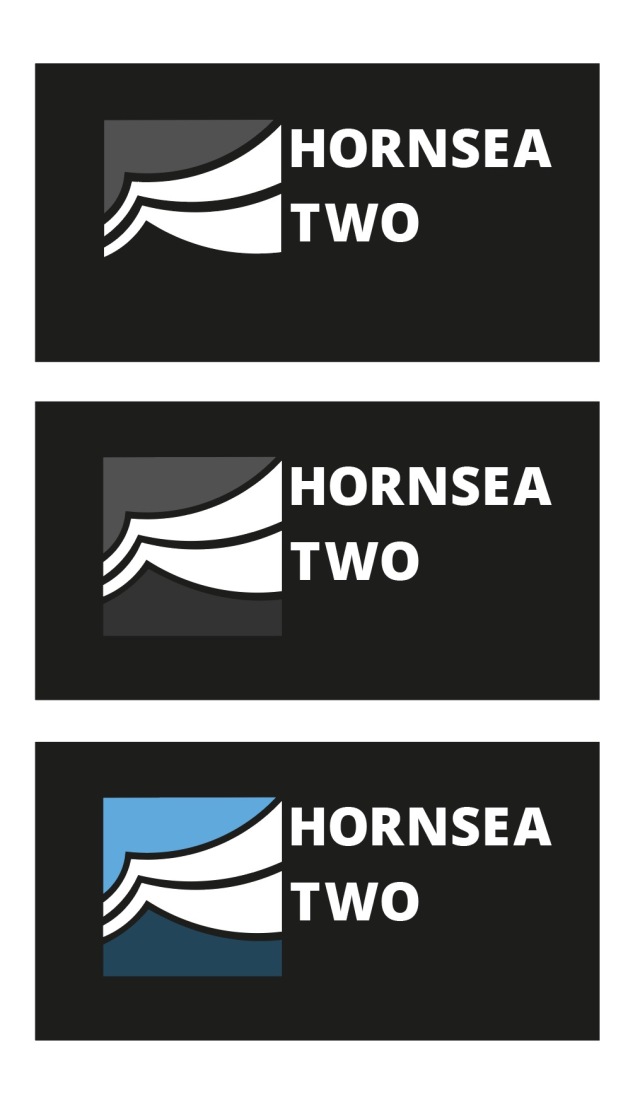
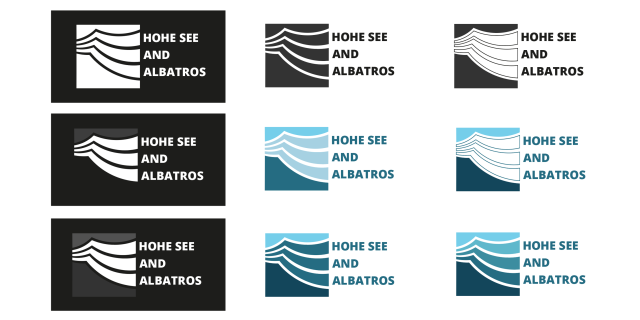
I experimented a lot with the pen tool and manipulating the lines ever so slightly to get very smooth curves in some of the logo concepts. I was really happy with the vague images of the logos above –  I thought that because the viewer could interpret the lines as they wanted the logo could represent what they want. Is it the wind, is it turbulent waves? It’s what you make it.

The abstract angle is the wrong road to travel for this particular client tough. They were less enthusiastic with examples from students that were a less direct answer to the brief. What was demand was something ‘simple’, something ‘obvious’.  And I can admit that it was deflating. It took a lot of potential avenues out (experimentation, and fun). But it just means I had to attack the problem from another angle. I did find it difficult to get exited over the sports logo direction, and don’t feel that my best strengths are able show through.

colour early albatros foot bal like
Early vector of a more football-like emblem

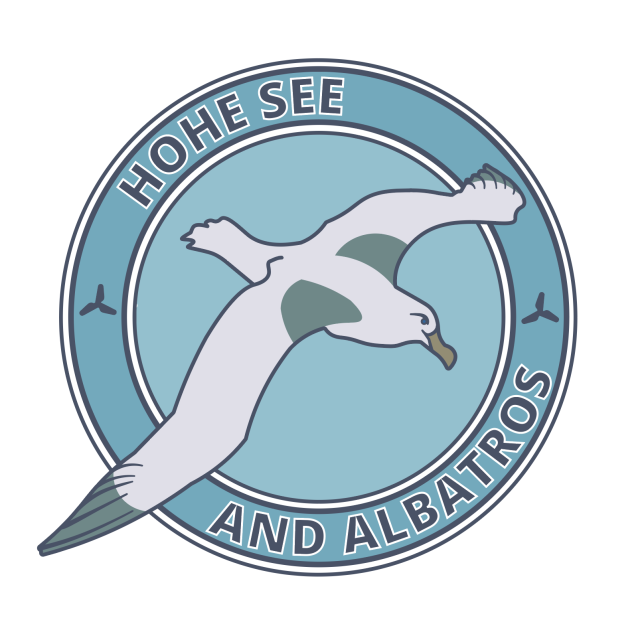
I returned to looking at the issue of providing the client with a crest-like logo. I drew many new scamps focussing on the albatross and the wind turbines. The sort of logo work I ended up vectorising became more of an illustration. (It also wound up looking a lot like a pre-existing Football emblem, I later realised.) Arriving at this conclusion, I feel that the brief really wanted a illustration from the start; not a logo.

I was given pointers by a tutor to help ‘modernise’ the feel of my first digital attempt of a ‘sports-inspired logo’. Varying the line width of the rings and removing the lines around the type gives the image a more contemporary look. It was desirable to remove the lines from the bird itself. I added a SOV vessel and wind turbines into the sea.

revised_seimens_final
Revised colour ‘Hohe See and Albatros’ logo

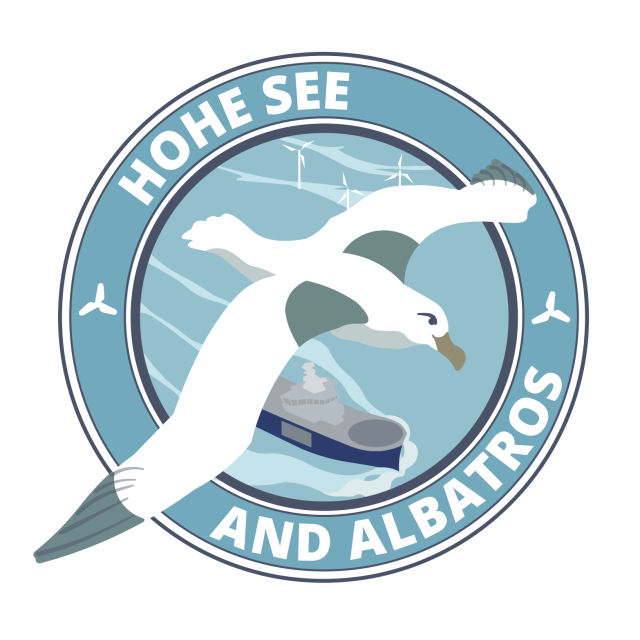
The logo as above does not function (or read) well in monochrome, however. This is because this logo was not initially conceptualised as a black-on-white mark, and is relying on a lot of colours and lines to communicate to the viewer. Without colour, it suffers a lot. (Believe me.)

I had wanted to work on this logo more and refine it with the aforementioned details before presenting digital logos to the client, but I was occupied overseas and busy with a work placement before I realised the time to pitch had arrived, and I hadn’t the program to do so. Since I wasn’t present for the presentation of student works, I do not know the outcome of the project. I would have liked to have heard some feedback on the vectors of my scamps that were dismissed beforehand, and the opinion of the emblem-like logo that was made closer to the client’s wishes.

Looking back on this project, I feel proud of the progress I have made recently using Adobe Illustrator, and how fast I can move when I need to. I feel happy with my more abstract symbolic designs even if they are not going to be utilised –  they were genuinely enjoyable to craft.

Character Design – Adobe Illustrator Vector

A staff member from the college’s computing department sent out an e-mail to tutors requesting student aid to realise a ‘cartoon bumblebee illustration’. I knew it was a good request when the e-mail started off with “Hey up Muchachos” and stated the desire for the cartoon illustration to be ‘cute’!

The e-mail contained a bumblebee sketch by the staff member. The requirements were to either create a colourised and realised cartoon interpretation of the sketch, or a polished black and white drawing. I opted to go all-out and made a coloured illustration in Adobe Illustrator.

bumble bee blue bacground
The finished Adobe Illustrator vector illustration!

The task was half-way realised by the staff’s sketch, (the body language and the level of anthropomorphism) but I watched some bumblebee videos online to look at the bugs closely and see if I could caricature them desirably. I very much liked the fluffy collar around the bee’s necks and wanted to show off how fluffy these bees are!

I drew a swarm of bees after watching the videos. My early sketches of the bees are so scrappy and wonky, I don’t want to share them here! I shared the final sketch over e-mail with the staff remember before diving into Digital art working. I simply traced over the finalised sketch in Adobe Illustrator.

BW BEE IN ILLUST
Vector outline traced over my pencil drawing

I used different (default) brushes and of different thicknesses. (I’m reminded that I should make my own brushes for personal use.) I did use several layers for the brush outlines, and I could have made due with three or so. Every layer was labeled (that is, named correspondingly). Once I was satisfied with the outlines, I felt it was time to apply colour!  Then the image took on life.

block colour bumbebee
Block colours

I used the pen tool to draw block shapes under the outlines to colour large areas. If I took more time, these coloured layers would have been more smooth. Most of the shading was made using blob tool with the opacity lowered.

all of the bumblebee layers
All outline and colour layers switched on

I made good use of opacity settings when adding (minimal) shading to the coloured layers. The wing’s opacity are especially low to emulate how thin and delicate real insect wings are.

bumblebee bg pink
Because the outlines are on separate layers, their colour can be changed easily

I was hesitant for the image to become too busy, so I down-played the shading. I’m happy with my outcome, but now feel that if any element should have been pushed further, it was the shading!

bumble bee coral bacground
HAPPY!

Because the original file is a vector, the staff member the bee went to can be used at any scale. It would make for cute stickers…! The coloured layers can always be turned off at any time to make use of the outlines on their own. Come to think of it… I didn’t think to ask what the illustration is being used for! Huh!

Rendering the cartoon digitally was a relatively quick process – it was a day’s work to polish up the sketch I was provided with and to re-create it in a digital format. Still, each time I use a digital program, I feel better adjusted when using it. I gather that I’d feel the most comfortable if I created my own library of brushes for use in such jobs – it’s much faster than fumbling through the pre-made library of brushes just to find the closest tool to the one I want!

Skills – Expectations & Reality

At some point, I’ll end up writing about the Digital Skills Application module in-depth; once I’ve some feedback. But I can already look on this module now and say with satisfaction that I have learned a lot.

During this module I’ve been met with some personal concerns. They have impeded progress somewhat.

BOX FR CUTTWEER
One of the food package (for macaroni and cheese) presented as it would be for printing; with a cutter showing the net on top.

I always feel a level of frustration that the work that I produce doesn’t reach the level that I aim for. My skill level is always lower than needed for my desired outcome. I think, overall, I should be proud of myself and how far I’ve come in regards to digital artworking and using programs one entirely unfamiliar. I’ve made a food packaging box that’s convincing enough!

It may be strange to say so, (and maybe a bad sign) but I’m most pleased with the reverse of the package! I think the amount of information that was legally necessary to include aided me in deciding on the layout.

BAKC OF BOX FINAL
The back of the mac and cheese ready meal box.

Even from just glancing at the completed packaging net, one who knows what’s up can see the mistakes that I’ve made this time around. I will be sure to have a more coherent flow of assets when making such packaging in the future. Since I made each side of the box independently, the assets end jarringly at the edge of each side. I also learned a thing or five about scaling. I never drew these to scale! A big mistake.

One learns more from mistakes than getting things ‘right’ the first time. If everything went accordingly right off the bat, I wouldn’t be questioning myself so much; and actions or precautions I must take to avoid error might not stick. With all that’s gone on during this long module, I feel that I’m ready to move on and start a new one. A change is as good as a break.

Adobe Illustrator musings – Try, try again

Drawing assets in drawing applications in which the images aren’t vectors seems fine. As long as I draw in a high enough resolution, it’s fine, right?

But then I’m not learning all the the possibilities to the vector-based program I have in my hands. I’m talking about Adobe Illustrator. I’m handy at making type-based graphics in it now. But drawing from scratch? No. I want to change that. The only way I’ll get to understand a program is to dive right in.

I’ve been told – a few times now – that I try to run before I walk. This time, even if it makes me anxious, I’ll try to go slow. I have to; to understand what I’m doing, and what the program is doing.

BRUSH IN AI
Various pen tool – “brush” – strokes across the digital canvas in Illustrator.

I messed about with some of he pre-set brushes in the program; swiped my pen across the screen to se how the artificial brush moved and lay on the canvas… I do the same to scrap paper as I try out the various ink pens and brushes in art supply stores. Although there is a limit to how many marks these brushes can make in this program.

I already had some sketches of logs that I made earlier put aside that I could trade. I just lowered the opacity of the original drawing and traced lines anew in Adobe Illustrator.

ilustrator log big

There are three different types of brush stroke in the images above. The colours vary, too. Perhaps I should have stuck to just looking at the types of bush in isolation before jumping into different colours. It’s would make digesting the information easier!

In comparison to the illustrations I made prior in another program, the colours here aren’t very pleasant to look at. I want to illustrations to match my expectations as closely as possible; and the way a colour feels is a big deal to me! I’m woking in YMCK and I have read that YMCK is good to work in for “packaging” – for printed media in general. Hmmm??

ilustrator log small
These aren’t zoomed out; the vectors have been shrunk.

The point of making vector art is that it can be any size you wish, without losing quality. It’s how large billboards can still have crisp quality image printed onto them. Although, sometimes, when shrinking a graphic, it becomes a little muddled.

Reducing the size of my log illustrations meant that the line art got rather gunky-looking (for lack of a better word). The bottom two logs here, are how the image contorted as I shrank the vector. The log on top however, I isolated the lines and changed the brush and thickness to render it far more legible.

I realise now that the best way to keep the lines in ratio while scaling down the image is to open the Transform panel and click the “scale strokes & effects”

hound doggy exp
A little messy, but it’s a start.

I drew a new digital sketch of a character asset in Autodesk, and then I placed it in Illustrator to trace. I decided that I’d concentrate on understanding line art better. I probably didn’t need the fidelity of the paintbrush tool to be at 100%, but I left it there (for smoothness of line).

I used multiple layers to apply colour under the line art. It’s no different to how I’ve used other art programs on the computer. But changing the colour is far more convenient in Illustrator.

FUNKY LINRS DOG
Same small size – different stroke outline.

Just as the logs did, this character’s lines became distorted when I shrank the vector. The image on the left is the line art without using having “scale strokes & effects” checked. I rather like the alternate brush on the amended artwork. But I know that I can keep the type of brush I used in the first place now.

Still, I worry that the drawing looks to flat and cheap; because a lot of ‘character’ got knocked out of my sketch when it became a digital vector. But I’m not used to seeing my drawings so clean. It may just be that’s it jarring to my eyes. If I carry on, I may adjust. It’s also good to hear other’s opinions – those who have more experience with the program especially.

I am happy that I stuck it out with this program; this is just a small step towards besoming very well-versed in it. I will endeavour to make all of the current module’s visual assets in Adobe Illustrator from now on… Everything should be much easier to piece together as vectors. I should have to worry less about speed as this type of art working actually cuts the need to use Photoshop and edit my illustrations for transparency and colour!

Adobe Illustrator – Text Manipulation

Using Adobe Illustrator for text manipulation is much faster and easier now with practice. I still find it easiest to use the program when wanting to manipulate text.

But I’m not yet confident in drawing in it. I understand the usefulness of having one’s work in a vectorised form. I’m used to fluid movement when drawing analogue. I must be … inadvertently fighting the program. It won’t move as I want, and the harder I shove the more strain on me. Of course a string of code won’t listen to my brand of logic; we’re worlds apart.

LIL EX FINALLLL
Both the product name and the Munch Stars logo together.

My desired logo for my children’s food product, named Little Explorers has gone through much change. With advice of tutors, I’ve been making the needed amendments. The shadow suggested by my tutor, gives more depth to my logo, and looking at older copies without a shadow… the logo looks a little cheap? Somehow, ‘flatness’ has conflated with ‘low-budget’.

A while ago I wrote about unintentionaly naughty portmanteaus and homophones, though I didn’t cover unfortunate imagery, and, well, with the typeface that I chose, some characters had some pretty yonic-looking counters. Yeah. …Yeah. It’s always the person who designs something who won’t catch these things, after looking at them for too long.

I was worried about having to assign a space on the packaging to the brand logo itself, and the package layout’s visuals looking splintered. The Munch Stars logo looks fine alongside my logo, and I hope keeping them close will make the layout outcome much less fractured.

MUNCH STARS LOGO no bg
The brand logo after swapping out the black boarder for brown.

It’s irrelevant that the logo for Much stars brand doesn’t appeal to my taste. Although I needed to soften the black outline of the logo and substitute the brown I was using as the black was too harsh against my own range of colours for use on my packaging. Usually, one doesn’t fiddle with a brand logo beyond its dimensions. There’d be brand guidelines to adhere to, which includes how a brand’s logo is presented.

I couldn’t edit the file for the Munch Stars logo that I was given in Adobe Illustrator however, and had to use Adobe Photoshop to change the black to brown with the magic wand and fill tool, as the image file didn’t seem to be a vector? It’s far more awkward to edit type in photoshop, and somewhat jarring that the program doesn’t sued vectors after becoming used to them in Illustrator.

The only way I’ll become more used to rendering images from scratch in Adobe Illustrator is to dive in and practice. It’s daunting, for sure.

Cinema 4D – First Steps

I’ve written an in-depth summary of the session using Cinema 4D in one of my digital workbooks, but it’s good to share a very brief walkthrough here – without mountains of strange jargon. The more I go over a process, the more likely I’ll remember it, too.

Cinema 4D is a modeling, animation, motion graphic and rendering application. In graphic design, it’s a useful tool to create mock-ups of imagined products. It can be used alongside Adobe programs.

3d bottle perspective
The first object that I modded in Cinema 4D.

I created models of a (beer) bottle and a drinking glass in the session. The bottle was a walkthrough. It would have gone smother if the class was patient enough to listen to instructions before jumping onto the process. It’s always best to listen fully to any instruction, and repeat it after. How else are you going to hear the entirety of the steps if your attention isn’t fully drawn to the instructor…?

Capture 01
Tracing an image in Adobe Illustrator.

I know how to draw basic shapes and make simple vector illustrations in Adobe Illustrator. Illustrator is used to create models in Cinema 4D. Although any vectors need to be saved as an older file type to be compatible with C 4D.

For better proportions, I traced an image of a bottle; just the left-hand side of it. Note that there is no dimension to my tracing; the bottom of the bottle is flat, because the program C 4D will add all the volume I need in due time.

Capture 02
An imported vector drawn in Adobe Illustrator in Cinema 4D.

The program C 4D allows for the user to move about the X, Y, and Z axis. It’s possible to move perspective and change views from 3D to 2D. Imported files aren’t placed on the handy coordinates of 0,0,0, so I have to move my drawing manually using perspective tools. Moving the image to 0,0,0, I know it’s centre of the space I’m working in.

full front bottle
A change in perspective.

Quite simply, I move my view of the drawing, navigating with the tabs atop the screen, so I can see my drawing face-on as it was in Adobe Illustrator, and I prepare to sue the lathe tool – to transform my 2D drawing into a 3D object.

Capture 05 tjickk
Thickening my lathed object.

Lathing the line isn’t enough to make it thick – that tool just makes the line three dimensional. I add thickness to my new object creating an outline… and the bottle is ready to be given a skin (a texture) to emulate a real bottle.

Textures can be found in the “content browser” tab on the far right of the screen. By selecting  “presets”, then “visualise” and finally, the “material” option, it’s possible to choose from a range of already existent textures. 

I picked a translucent glass texture, but I also wanted to make a blue glass bottle…? There a slider to change the colours used on any pre-existing or new textures one uses. Slide it until you find the desired colour.

bottle lighting
I have applied a glass texture to the bottle. The environment has a and floor, sky, and of course, lighting here.

It was amazing to see that my 2D vector was transformed into an object that looked like one in the real-world; something that I could imagine picking up.

And thats’ where this program comes in handy… modeling an object that could be a potential product to be sold in stores in C 4D helps show clients, and co-workers a solid visualisation.

Capture 15
Adjusting a texture (Newcastle Brown Ale label) to fit a model proportionately.

Objects such as bottles usually come equipped with labelling. I used Adobe Photoshop to create a texture, becoming a label for the bottle. I used an image of the Newcastle Brown Ale label. There are different ways to apply textures. If I had an objet that suited a wrap-around texture, I could do just that. In this case, I just need a label to fill one view of the bottle.

The finished render was alright. I made some mistakes such as leaving a hole in the bottom of the bottle – easily amended by fiddling with the “outlines”, and the label was originally too high up on the bottle, leading it to be scrunched. Again, such an error is fixed easily, if you know what tools you need to adjust the mistake.

I repeated a number of these steps (many not fully-detailed here) to create a glass cup. I was happy that I retained a lot of the knowledge. The program still feels daunting, but I have many lessons to go! Many chances to practice and improve.